Step-by-Step Guide for Filling Out a Check
Step-by-Step Guide for Filling Out a Check
Today, the easiest way to send money in Mexico is through bank transfers, leaving traditional methods like checks behind. However, checks are still a functional option, meaning that many places accept them, and some people still use them.
If you’re one of those people but aren’t sure how to fill out a check in Mexico, here’s the detailed process:
Step 1. Start by Writing the Date
Locate the “Date” field in the upper right corner of the check. Once you find it, write the day, month, and year with a blue or black pen in the Day/Month/Year format.
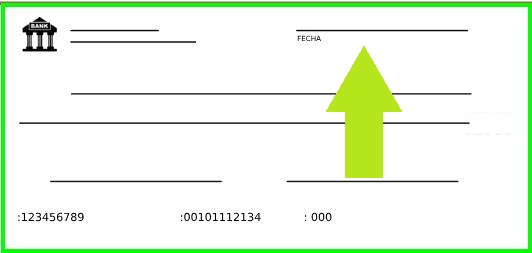
You can also write it out more fully, like “November 4, 2024.” This date lets the bank and the recipient know when the check was issued. It’s essential, as it can affect the validity and time frame for cashing.
Step 2. Add the Recipient’s Name
Next, indicate the name of the person or entity receiving the payment. You’ll usually find this on a line marked “Pay to the order of.” Make sure the information is written correctly, as this identifies the person who is legally allowed to cash the check.
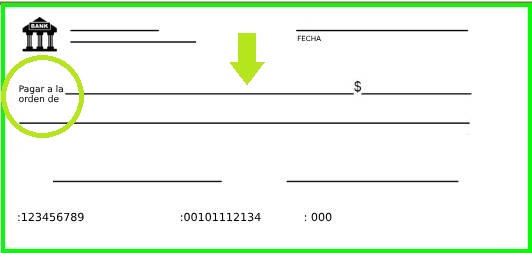
Step 3. Write the Amount in Numbers
The area to add the numerical amount is located on the right side of the check. It’s a box near the “Pay to the order of” line, marked with a dollar sign (“$”).
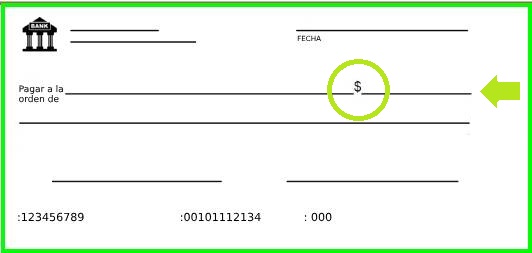
Write the exact payment amount in numbers, including decimals, even if they’re zeros, so it reads clearly and without confusion. Note: Avoid leaving space after the “$” sign to prevent any possibility of an extra number being added.
Step 4. Write the Amount in Words
You’ll also need to write the amount in words in a space below the recipient’s line. This should match the numerical amount and helps confirm the exact payment value.
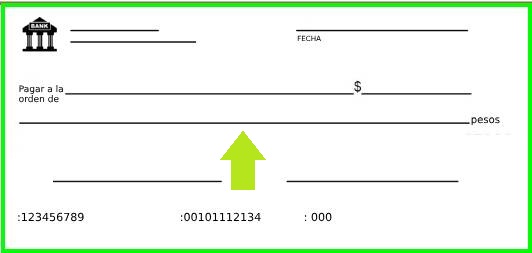
If there are cents, use “and” to separate pesos from cents in fractional form, like “One thousand two hundred fifty and 00/100.”
Step 5. Add a Note or Reference for the Check
Some checks have a space in the lower left corner labeled “Memo.” This field is optional, but it can be helpful to remind you of the purpose of the payment.
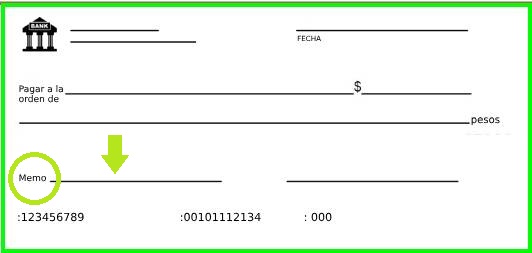
Write a brief description like “Service payment” or “April rent.” While not mandatory, it’s a good habit for tracking the reason for each issued check.
Step 6. Sign the Check
The final step is to sign the check on the line at the bottom right.
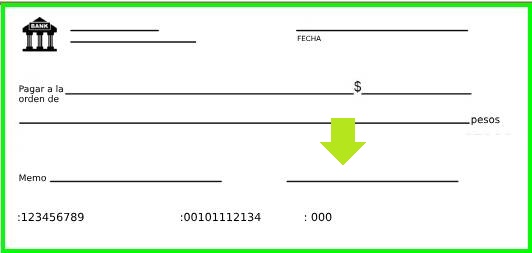
Remember, your signature officially authorizes the check, allowing the bank to process the payment. Without it, the check is void. Ensure that your signature matches the one registered with your bank account.
This is the correct way to write a check. Alternatively, you could try writing one online through banks that offer this feature, such as BBVA Mexico.
How to Endorse the Back of a Check
If you want to authorize someone else to cash or deposit a check, you need to endorse it. This means using the back of the check to transfer ownership to another person. The process involves the endorser, who transfers the check’s rights, and the endorsee, who becomes the new payee.
Here’s how to endorse the back of a check:
1. Write the name of the person or entity to whom you’re transferring the rights.
2. Add your signature and identification number to formally validate the transfer.
3. If it’s a deposit or cashing, the new payee must sign, include their ID number, and specify their account number.
With all the details complete, the endorsee can present the check at the bank for cashing or deposit, with proper identification.
However, note that some checks include terms or phrases preventing them from being endorsed, such as:
What to Do If You Make a Mistake Writing a Check?
If you’re just learning how to fill out a check and make a mistake, it’s normal. Even experienced people make errors sometimes. If this happens, the best course of action is to void the check to avoid any misunderstandings. Simply write “VOID” across the front of the check in large, clear letters.
Since it’s a manual process, there’s a greater chance of errors than with digital transactions. While fraud exists with bank transfers, they’re often a more convenient option for anyone needing to send money quickly.
You might also consider digital wallets, which are faster and more modern. For example, you can set up Google Pay and link a bank account to pay directly from your mobile device.
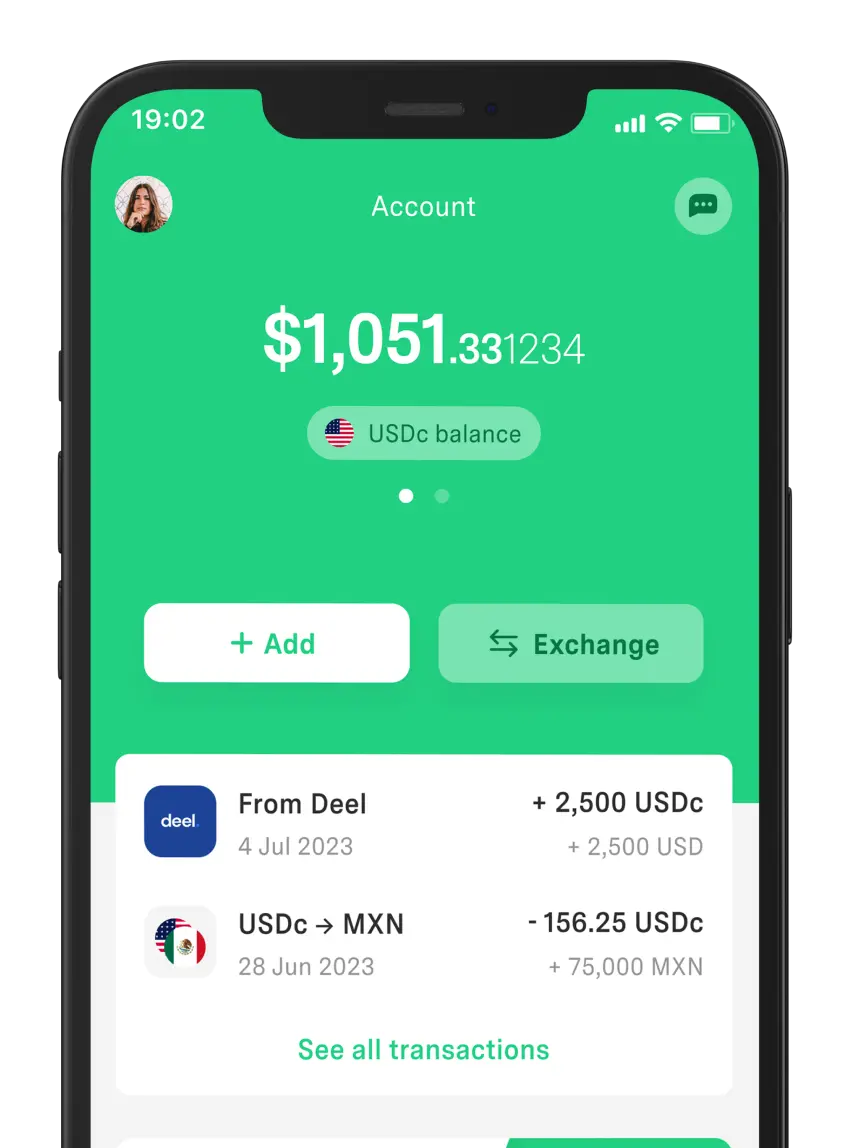
If you’re looking for an even more cost-effective option, DolarApp is the perfect ally, especially for international transfers. The app is designed to make sending and receiving money simple via a U.S.-based digital dollar account. Additionally, it enables USDc to MXN and MXN to USDc conversions at the best exchange rate available.
 Your Money
 Your Money
 Your Money
 Your Money